Slicked-back Wet Look: The Ultimate Power-hair Style Guide
Published on November 23, 2025

Slicked-back Wet Look: The Ultimate Power-hair Style Guide
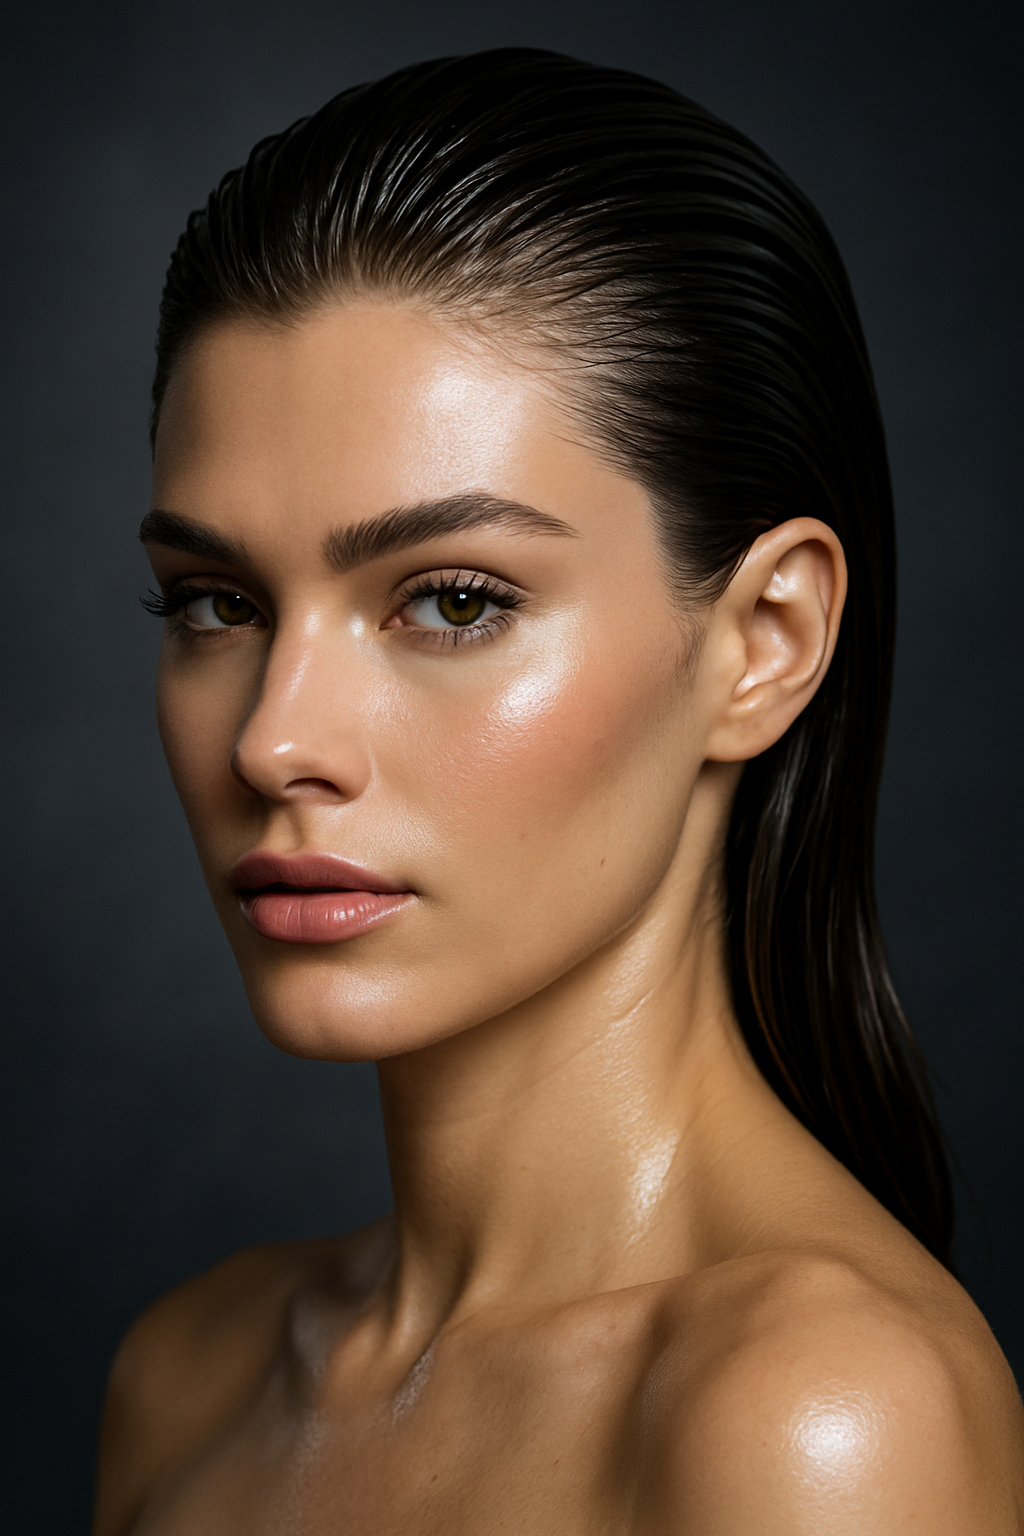
Slicked-Back Wet Look: The Glossy Style That Means Business
The slicked-back wet look is the hairstyle equivalent of a power suit: bold, clean, and unapologetically confident. Loved on red carpets and runways, this glossy style pulls hair away from your face to highlight your features, your makeup, and your attitude.
Whether you're aiming for high-fashion drama or a minimalist, model-off-duty vibe, this look is surprisingly wearable—and easier to recreate than it seems.
Quick Style Specs
At a glance:
-
Length:
- Best on: short bobs to long hair (chin length and below)
- Can work on: pixie cuts with enough top length to push back
-
Vibe:
- Glossy, polished, confident
- Runway-ready, editorial, evening-ready
- Gender-neutral and ultra-modern
-
Best Face Shapes:
- Oval
- Heart
- Square
- Round (with added height at the crown)
-
Hair Types:
- Straight to wavy: easiest to slick totally smooth
- Curly or coily: stunning with defined, glossy texture
Why Everyone Loves the Slicked-Back Wet Look
This style has become a staple for celebrities, influencers, and fashion editors because it checks so many boxes:
- Instant polish: Makes even day-three hair look like a deliberate, styled choice.
- Face-framing without the fuss: Opens up your features and puts your makeup front and center.
- Low-maintenance once styled: It’s designed to stay put for hours.
- Versatile: Works with sharp tailoring, slip dresses, streetwear, and even a white tee and jeans.
It’s the ultimate "I woke up like this, but make it fashion" hair.
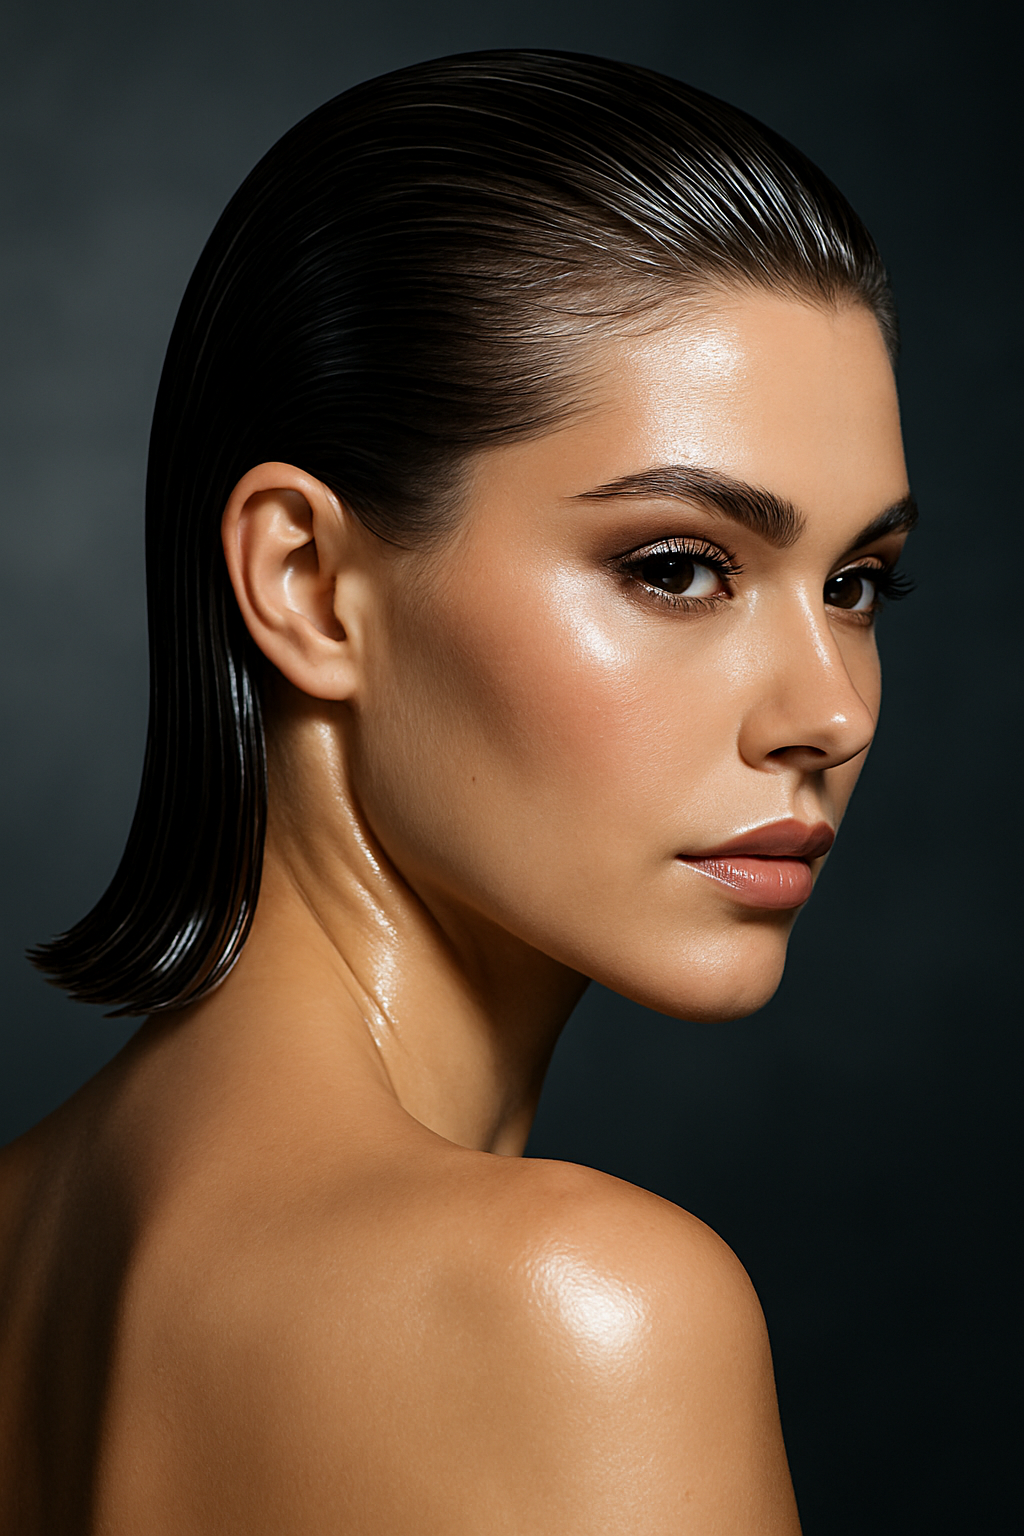
Choosing Your Version: Soft, Sharp, or High-Drama
1. The Soft Slick-Back
Perfect if you want something wearable for day or office.
Key elements:
- Slight volume at the roots
- Gentle, combed-back movement
- Shine without looking overly wet
Best for:
- Work events, dinners, smart-casual outfits
- Straight or softly wavy hair
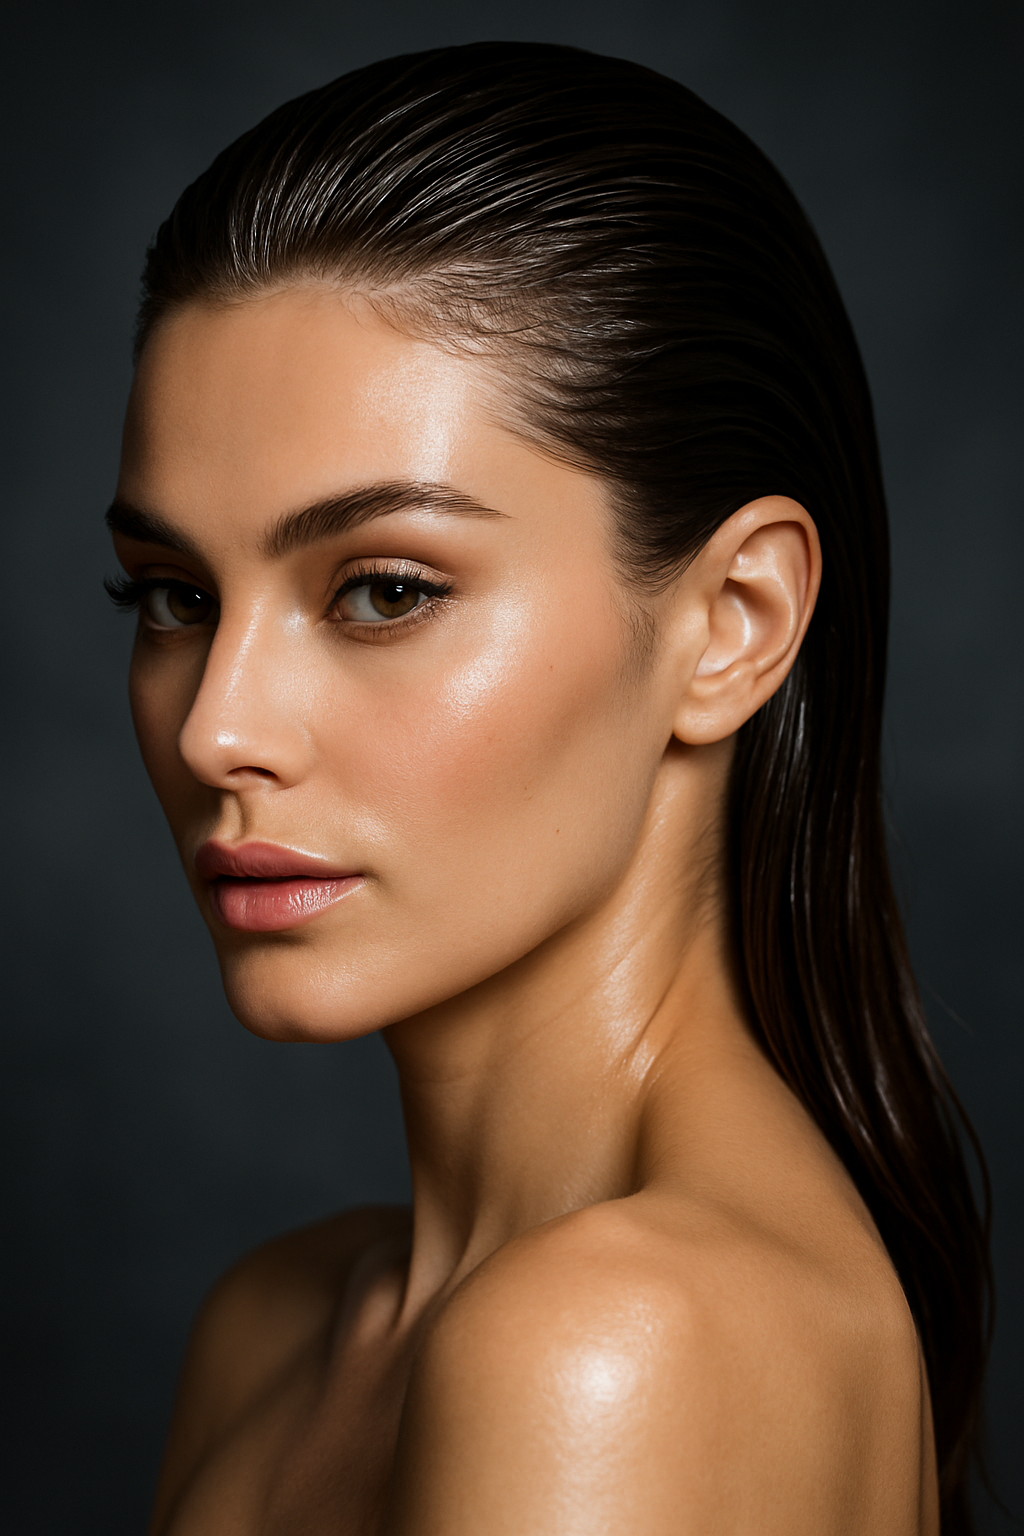
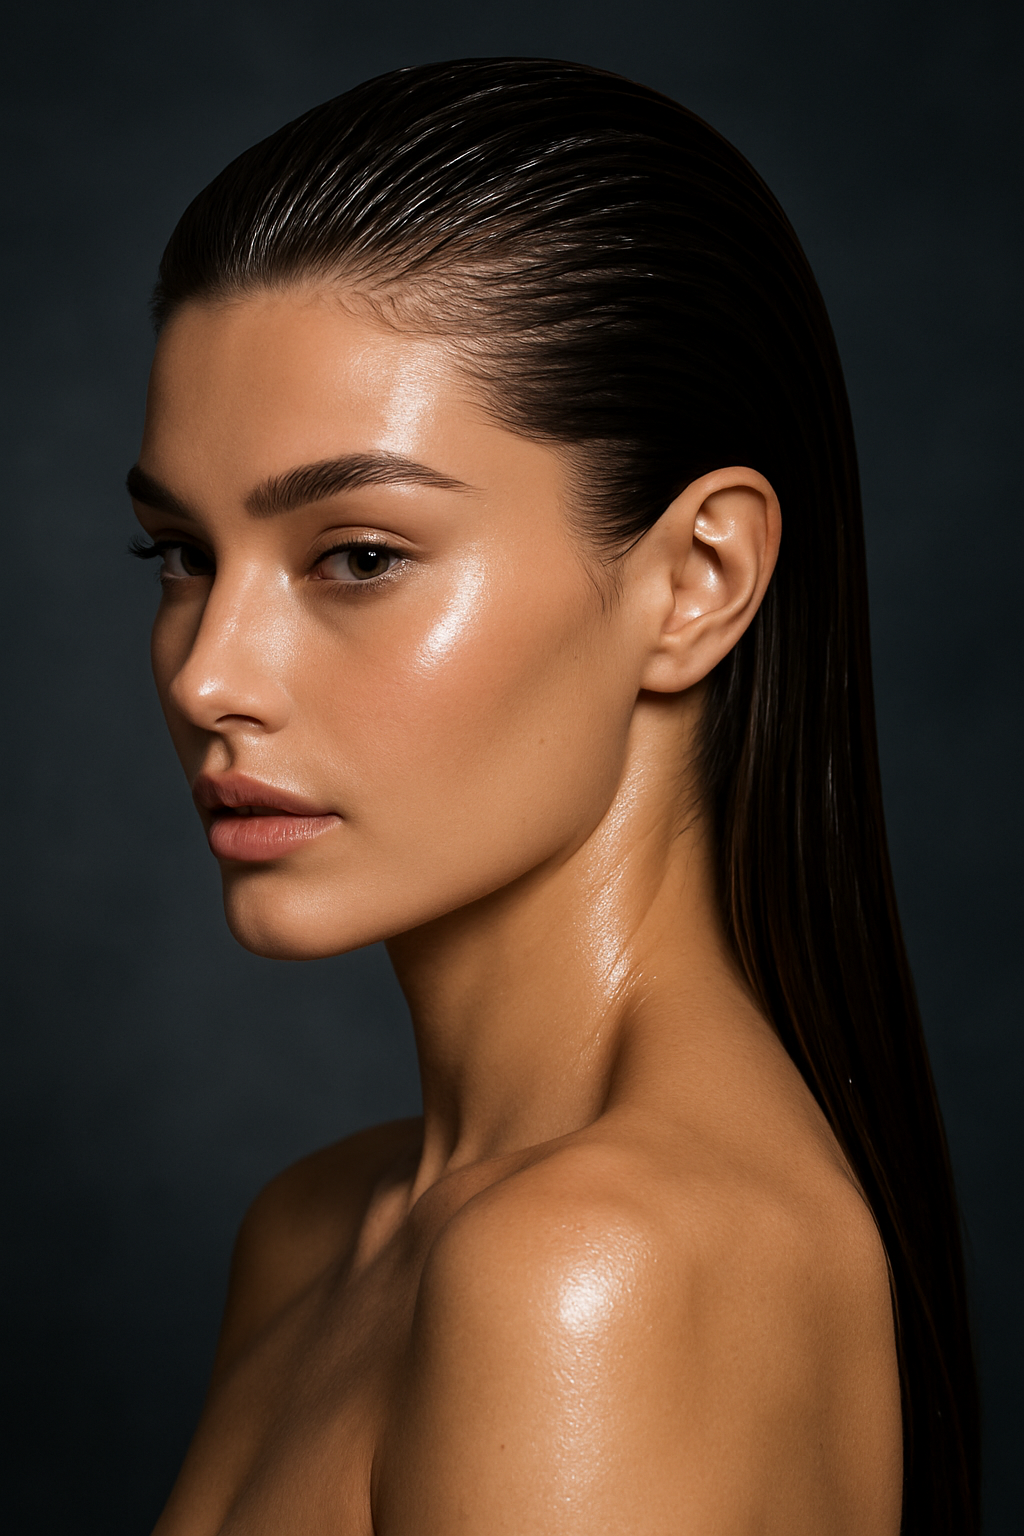
2. The High-Gloss Runway Wet Look
This is the full drama, red-carpet version.
Key elements:
- Intense, mirror-like shine
- Roots and lengths look damp (but not dripping)
- Impeccably slick sides with clean lines
Best for:
- Nights out, events, photoshoots
- Statement makeup and strong fashion looks
3. The Textured Wet Look for Curls & Coils
Curly and coily hair can turn this style into a sculptural statement.
Key elements:
- Slick roots and hairline
- Defined, hydrated curls or coils through the lengths
- Strategic use of gel and curl cream for hold + softness
Best for:
- Natural texture lovers
- Anyone who wants bold shape and definition
Step-by-Step: How to Create the Slicked-Back Wet Look
Pro tip: This style often works best on slightly damp or day-two hair. Ultra-clean hair can be too fluffy.
Step 1: Start with the Right Base
- Lightly mist your hair with water or a hydrating spray to make it workable.
- Detangle gently with a wide-tooth comb or brush.
- If you have fine or flat hair, apply a volumizing mousse at the roots to prevent the style from looking plastered.
Step 2: Choose Your Part (or No Part)
You have three main options:
- No part, straight back: The most classic, editorial finish.
- Sharp middle part: Symmetrical and modern, great for balanced features.
- Deep side part: Softer, flattering for round or square face shapes.
Use the end of a tail comb to create a super clean part if you’re not going straight back.
Step 3: Apply Your Styling Products
You’ll usually layer hold + shine to get that wet effect.
For straight or wavy hair:
- Apply a strong-hold gel from roots to mid-lengths.
- Work a lightweight hair oil or shine serum through the mid-lengths and ends.
For curly or coily hair:
- First apply a moisturizing leave-in conditioner or curl cream to define.
- Then apply a firm-hold gel over the top, concentrating at the roots for a sleek hairline.
Start with less product than you think you need—you can always add more for extra gloss.
Step 4: Comb It Into Place
- Using a fine-tooth comb, sweep hair back (or along your chosen part) in controlled, even strokes.
- For a super sleek finish, hold your hair with one hand while combing with the other to flatten flyaways.
- Decide on your shape:
- Tight to the head: Minimal, razor-sharp look.
- Slight lift at the crown: More flattering for round and square faces.
Step 5: Lock It In
- Press hair gently against your head with the flat of your hand to set the style.
- Mist generously with a high-hold hairspray for all-night endurance.
- Optional: Clip the sides back with flat, crease-free clips while your products set, then remove before heading out.
Product Playbook: What You’ll Need
| Product Type | What It Does | Best For | |---------------------|----------------------------------------|------------------------------------------| | Strong-hold gel | Gives structure + wet effect | All hair types | | Shine serum / oil | Adds gloss without crunch | Mid-lengths and ends | | Curl cream / leave-in | Defines and hydrates curls/coils | Curly & coily hair | | Volumizing mousse | Prevents flat, helmet-like shape | Fine or straight hair | | High-hold hairspray | Locks style, controls flyaways | Long events, nights out |
Bonus tools:
- Fine-tooth comb for precision
- Tail comb for sharp parts
- Crease-free clips for setting the sides
Customizing for Your Hair Type
Fine or Thin Hair
- Use mousse first, then a light gel so it doesn’t collapse.
- Avoid heavy oils at the roots—keep shine serums on the mid-lengths to ends.
- Create a bit of height at the crown to avoid a too-tight, flat look.
Thick or Coarse Hair
- Choose a stronger gel or pomade with serious hold.
- Apply products in sections to ensure everything is evenly coated.
- Use a boar-bristle brush after combing to really lay the hair down.
Curly & Coily Hair
- Prioritize moisture first, hold second.
- Use a curl cream + gel cocktail: cream for softness, gel for control.
- Slick the first few inches back, then let curls or coils cascade with intentional texture.
Maintenance: Keeping It Sleek, Not Stiff
The slicked-back wet look is a "set it and forget it" style, but a few smart moves make it more comfortable and hair-friendly.
During the Day or Night
- Keep a mini gel or wax stick in your bag to smooth any rebellious flyaways.
- If your hair starts to fluff, dampen your fingertips, add a pinch of gel, and press the hair back into place.
After You Take It Down
Because this style uses more product than most, cleansing matters.
- Use a gentle clarifying shampoo once a week to remove buildup.
- Follow with a hydrating mask or deep conditioner to keep hair soft.
- Avoid aggressively scrubbing your scalp—massage gently with your fingertips.
Pro tip: On wash day, apply a nourishing hair oil to the ends before shampooing to protect from dryness.
When to Wear the Slicked-Back Wet Look
This style shines (literally) in so many settings:
- Evening events and parties where you want high impact with minimal effort.
- Formal occasions as a clean contrast to dramatic makeup or statement jewelry.
- Photoshoots and content creation for a timeless, editorial look on camera.
- Hot, humid days when you’d be fighting frizz anyway—turn it into a style moment.
Try Before You Gel: Test the Slicked-Back Wet Look Virtually
Thinking about going full-gloss but not sure how it will look with your features, hair length, or natural texture?
Skip the guesswork.
With InstaHair’s virtual try-on, you can:
- See the slicked-back wet look on your face in seconds
- Test different partings: center, side, or straight-back
- Play with softer vs. high-drama versions
- Compare this style against other sleek or textured looks
No mess, no product overload—just instant, realistic previews.
Ready to see if the slicked-back wet look is your new signature style?
Head to InstaHair’s virtual try-on, upload your photo or use your camera, and experiment with this power hairstyle from every angle before you commit.
Slicked-Back Wet Look: The Ultimate Power-Hair Style Guide Hairstyle Gallery